Friday, 3 November 2017

Challenge tree

Hi, I'm hoping you're not going to laugh too hard at todays card, it was definitely a challenge, lol.  There is a Christmas tree comp. running on the challenge group I'm in on fb, the tree has to be drawn or painted and you can't use stamps or dies, so, back to basics.


 I wanted to at least try and get my tree symmetrical, so above is a pic of one of many fails at my weird little tree.


I ended up with this, I added some different size gems and some tinsel, then covered in glitter.  For my background I swirled some blue, pink and white pearlescent paint and while it was wet randomly added some chunky glitter flakes and glitter.


Thanks for looking and any comments you may leave, if nothing else, hope I've given you a laugh today.


Maria

x


Saturday, 14 October 2017

Snow globe

Hi all, I haven't really been up to date with blogging lately, I've gone back to working nights after a long break.  I'm struggling to keep up with everything at the moment, I was diagnosed with lung disease but I'm determined not to give up work, so keep your fingers crossed for me everyone.

This is a card I made for a facebook challenge, its a Christmas village.

It's much larger than I intended it to be, so I couldn't use the stamped image I originally wanted to use.  I searched and found the free image on Pinterest. 

The snowglobe was cut with my Silhouette Cameo, I added lots of glitter and acetate to the centre, the snowflake dies were cut in pale blue and white from dies from Aliexpress and I added lots of glitter.  Really simple card, but took me forever, lol.


Thanks so much for looking and any comments you may leave.


Maria


x

Friday, 29 September 2017

Pink Shoes?

Afternoon, I haven't been around for a while because I'm now back in work (night shift, argggh), after a long absence due to lung problems.  This is a card I made a few weeks ago for my Daughters birthday in November, however, I'm not sure whether or not to make her another one, as I feel this looks a bit 'wedding like', thought I'd share it and get some of your opinions.
I didn't have a true baby pink card, so I used a pink alcohol marker to colour everything, I just coloured about an inch of the first layer, my second layer was plain white card which I sprayed with Crafters Companion stick and stay, then covered in glitter.
To make my heart frame I used this heart border die from Aliexpress.
I cut it to the required size, then glued a thin strip of card along the bottom of each of my die cuts.
I then glued at each corner to make a square.  I cut an extra piece so that I would have some spare hearts.

And I have glued a heart in each of the corners, then topped with a pearl to disguise any bits of card.  I then used the same pink marker to colour the hearts and also the shoes and Sue Wilson Striped Nasturtiums die (the flowers).  Then added more pink and white pearls, a ribbon and printed out a sentiment on my laptop, which I then cut with a little tag die.
Inside, I've just added some paper I found in my stash and used a sentiment stamp set which I purchased from Aliexpress.

Thanks for looking and any comments you may leave.

Maria

xx


Wednesday, 13 September 2017

Christmas Lantern

Afternoon, hope everyone is ok with this awful weather we are having, I've been ferreted away in my craft room again today, so I have another quick card to share for week 37 of the facebook challenge, the theme this week is Christmas candles or lanterns.


I started with a a5 card blank and made a bow front acetate card.  The lantern was a free digi stamp,( I just googled free Christmas digi stamps) which I coloured with promarkers and added some glitter flakes.  The fir trees behind my 'window' are dies from Aliexpress and I've cut them in white card and again added some glitter flakes.  The Ivy is also a die from Aliexpress.

All the other foliage is Sue Wilson dies, Berry Bough & Pine Cone & Greenery.


The white raffia I used for my bow was £2 from Hobbycraft and I've added some little berries from Aliexpress.


The little golden bells were also purchased from Aliexpress (Aliexpress is a bit of an addiction for me at the moment, prices are so good).

Thanks for looking and any comments you may leave.


Maria


x


Tuesday, 12 September 2017

Horse Racing

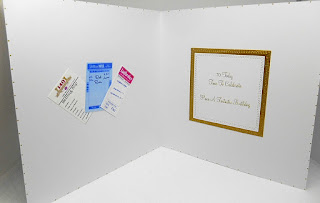
Afternoon, I've got a quick card to share today, It's my Uncles 70th Birthday on Friday and he loves horse racing.  I find mens cards so hard to make, so didn't have a clue where to start, so I just googled some horse racing images.


The card is 8" x 8" and I've used a combination of white & gold card.  The largest white layer is embossed using a Darice a4 polka dot embossing folder, for the next white layer I've used Sue Wilson Shadow Box Collection - Stitched Lattice Frames, the lattice is approx. 5" x 3 3/4" but is really easy to extend, which I have done for this.  When I had my lattice all cut I used spray adhesive to layer it onto some white card and used a circle die to cut the centre out, creating a frame for my picture.

The betting slips and horse trophy were all free images I found via google and took into my craft artist programme to resize, I also added my uncles name and age to the front of the trophy.

The sentiment was stamped with some free stamps from papercraft inspiration magazine, I then cut it with a stitched banner die and layered it onto the gold card.


And the inside, again using Craft Artist to create my sentiment.  Very quick card.

Many thanks for looking today and any comments you may leave.


Maria


x


Saturday, 9 September 2017

LOTV Carol Singers

Afternoon everyone, I had totally forgotten I had this cute stamp until I saw the week 36 theme for a fb challenge group was carol singers, so I went on the hunt (need to organise my stamps).  I was doubly happy when I found this stamp because I was so appalled at the state of my craft room, I not only managed to stamp and colour my image, but also give the craft hovel a good clean.


To make my card base I have used three edger dies, the Anja border die from Marianne Designs was given to me by a friend, and made the main base card, the ornate semi circle die and the slimmer die on either side of the image is either a Sue Wilson or Spellbinder die (had it quite a while).

I've inked through the Anja border die using antique linen distress ink (for some reason the colour looks really bright in the pic, but in reality is quite pale).  I stamped the image with memento ink and coloured with promarkers and also used a white gel pen to add snow to the image.


I die cut the fir trees in white card, then used some pva glue and nuvo glitter for snowy accents.


For the 'Merry & Bright' I used Heirloom Ornament stamp set by Creative Expressions and stamped it with fired brick distress ink, and hand cut into a banner and added a die cut snowflake.


I made the bow out of some white raffia I picked up from Hobbycraft (think it was about £2), the holly was cut with a woodware punch and I've used a script stamp on them again using antique linen distress ink.  The little bells were from Aliexpress and berries were in my stash, I've also used Sue Wilson Pine Cone & Greenery die set.


Inside I've die cut the lamppost and coloured with promarkers, then used a wooden Penny Black stamp (I've had for years and it comes out every year) for the sentiment and stamped it with fired brick distress ink.


Thank you so much for taking the time to look today and for any comments you may leave .


Maria


x


Thursday, 7 September 2017

Lace & Pink

Good Afternoon, I'm sharing a card today that I made a while ago, for a customer.  She wanted pink & lace to be included but didn't want it overly girly.


I've had these dies for ages and for some reason hadn't used them, so I started with a 8" x 8" card blank and cut diagonally across the centre, then turned my cut card so that it gives me the cross over.

I've used pale pink centura pearl card stock and embossed it with a Crafters Companion embossing folder, then added some lace from my stash to the edges and topped with flat back pearls.

The flower dies are Striped Nasturtiums by Sue Wilson and I've cut them in a mixture of the pink and some white centura pearl card.

I printed the message using my laptop, cut it out using a nesting die then layered it onto the Rose Oval die set.  The ribbon I've used for my bow is white silky crush by Creative Expressions.


Picture isn't very clear but I,ve used Craft Artist to print a floral edged insert and added the sentiment that my customer requested, I've also added another Rose Oval die cut in pink and popped a butterfly in the centre.


For the box, I've again used centura pearl in both pink and white using  the same elements as I've used on the card.


Thank you so much for looking today and any comments you may leave.


Maria


x


Monday, 4 September 2017

Pink Santa

Afternoon everyone, it is yet another rainy day here, so I'm making Christmas cards again.  I've recently joined a lovely Facebook group https://www.facebook.com/groups/1834318580126213/?ref=group_header, called make one Christmas card every week throughout 2017 challenge.  There are lots of competitions, themes, etc, and everyone in the group is so positive.

So this is a card I made for last weeks theme Santa/Father Christmas.


Think I went a bit OTT with this one, lol.  All the papers I've used were downloaded from Pinterest, I've then re-coloured (don't know if that is even a word) them and re-sized.  I've distressed all the edges using a scissors and then added glitter flakes.

The largest snowflake was cut on my Silhouette Cameo and the others were from Aliexpress.  I cut them all in white card and used spray adhesive to add some iridescent glitter.


I made my poinsettias using my own template with white foamiran and coloured them lightly with a blue oil pastel (colour doesn't show at all in pic).  I have used Sue Wilson Pine Cone and Greenery die set behind the poinsettias and finished off with some little pine cones I bought in Hobbycraft (modelling section) I think they were around £3, and I've coloured them with some tippex.  I added a pink organza bow, which I have 'shabbied' by heating with my heat gun.

The stamped sentiment is a wooden Penny Black stamp I've had in my stash for years.


Thanks so much for looking today and any comments you may leave.


Maria


x


Friday, 1 September 2017

Christmas Church

Afternoon everyone, it's a fab sunny day here and I'm making Christmas cards again, lol.  Never mind keeps me happy.


I've used white pearlescent and silver mirri card but started with a 8" x 8" scalloped card blank (purchased in The Range).

The die I have used for my background and the frame around my church is Sue Wilson Swirly Vine Die Set.  

I've cut the Church die several times so that I've got lots of extra trees to layer and I then fussy cut some silver mirri card to back the church and topped the roof with some glass glitter.

To finish off I've cut lots of Ivy and outlined it with a silver gel pen, added a bow with some silver ribbon and put some silver pearls in each corner, also in each corner of the frame.


Inside I've used a wooden Penny Black stamp (that I've had in my stash for years) for the sentiment and added more of the ivy in each corner and I've also added the lamppost using a little colour on it by using a silver gel pen.

Hayley Green has commented on the previous post to inform me that she has received her goodies from my giveaway, I'm glad your happy with it all Hayley, happy crafting.


Thanks for looking today and any comments you may leave, I really appreciate it.


Maria


x


Saturday, 26 August 2017

Foamiran Lilies

Afternoon, looks like we're going to have some sunshine here for the bank holiday, although I won't see much of it, I'll be crafting (I've a few orders to catch up on).  The card I'm sharing today was made last week and I intended to send it to the winner of my craft giveaway to thank them for following my blog.  Hayley Green was the name picked out of the hat but unfortunately Hayley still hasn't been in contact, so I'll give her a few more days and if she hasn't contacted me by Wednesday I'll draw another name.


The background paper I have used was a free download, unfortunately I can't remember where from as I have had it on my laptop for a few years, but at the end of the post I'll list some of my favourite blogs for lovely papers.  Feel free to take a copy of the one below.


I have made the lilies out of white foamiran and coloured them with oil pastels and pro markers.  The white frame and eastern trellis were cut using my silhouette cameo and I printed the 'with thanks' on my laptop and cut the banner freehand.


For the papers I've used a scissors to lightly distress the edges and then used tumbled glass and spun sugar distress inks.  I've used the same paper inside the card and then add a die cut shape to add a message.

Thanks so much for looking and any comments you may leave.  These are lovely blogs I follow that offer lots of beautiful free  downloads.


Maria


x


Thursday, 24 August 2017

Winner of giveaway

Hi everyone, apologies for not posting much in the last week but I had a specialist app. on Tuesday and my uncles funeral yesterday.

The winner of the giveaway is Hayley Green, please can you either email me your postal address thechef@tiscali.co.uk  or message me on Facebook.

Congratulations HAYLEY GREEN.


Maria


X

Friday, 18 August 2017

Motorbike card

Afternoon everyone, I've got a quick card to share which has probably been the most frustrating thing I've ever made, I struggle so much with mens cards.


This card is for my Brother who recently treated himself to a motorbike (mid-life crisis me thinks, hope he doesn't see this, lol).

I started by searching for some free motorbike emblems and took them into my graphics programme to create a backing paper (feel free to download a copy if you wish).


I trimmed the sheet and used tumbled glass distress ink around the edges and matted it onto some blue card and then used foam tape to layer it onto a 8" x 8" white card blank.  I also downloaded some maps from https://freevintagedigistamps.blogspot.co.uk nd cut a strip of a map and layered it behind some of the blue card which I had die cut using Sue Wilson Stitched Lattice Frames.  I also used the map behind my die-cut motorbike, which I purchased from Aliexpress.

For the tags I die cut some small rectangles and cut the tag ends by hand, then stamped the greetings in vintage sepia versafine ink, using some free stamps from a magazine.


And inside matt & layered with the same paper & card.


Let's hope he likes it, thanks for looking and any comments you may leave.


Maria


x


Wednesday, 16 August 2017

Crafty Giveaway

Afternoon everyone, last week I got the wrong size glue sticks delivered and I thought, rather than return them, I would pass them onto someone else that could make use of them.  I wouldn't just give glue sticks though, so I've made up a load of goodies including - Hunkydory toppers & papers, 100 7mm x 100mm hot glue sticks, Kanban frames, glitter, stamps, dies, embossing folders, a piece of red foamiran, stamens, Crafters Companion Enveloper Pro & some ribbon. I  Couldn't really get everything into the pic.


There's much more than the pic shows.

So to be in with a chance of winning my crafty giveaway it would be really nice if you could become a follower of my blog (if you are not already) but this isn't obligatory.  Just leave a comment on any post between now and next Wednesday, I'll then put the names in a hat and pick someone randomly, so don't forget to check this blog next Thursday 24th August when I'll announce the winner, good luck.

A few more picks from yesterdays card.


Thanks for looking and any comments you may leave.


Maria


x


Tuesday, 15 August 2017

Foamiran Poinsettia Step By Step

Afternoon everyone, I decided to write this blog post because every time I post a pic of a card on groups on facebook that has poinsettias on it, people always ask how I make them.  I am, by no means an expert and there are some fantastic facebook groups - foamiran flower lovers being one, where there are amazing flower examples.  For this card I've used some red poinsettias and I'll pop all the details on the blog tomorrow, along with details of how you can get a goody box with 100 glue sticks in my giveaway.


I started making poinsettias with my dies but have found that when I heat or manipulate the foamiran, the centres become so small that it's impossible to put stamens through.


As you can see by the above pic, the one I've heated is in my hand.
So I had a play around until I was happy and drew out a template, where I have kept the centre of the flowers large enough for the stamens to be pulled through.  The template below can be saved and printed out, it should be 3" x 3", easy to do if you have serif craft artist or my craft studio, If your just printing from windows the just choose the nearest pic size.


So I started with a sheet of red foamiran from Foamiran World and it really is a lovely 'true colour' Christmas red, I've drawn around the template, covering the whole sheet.

I then coloured the centres and some edges of the leaves with a yellow oil pastel (quite randomly).

 This foamiran can be manipulated slightly without heat, but I've found the best results by heating.  I put my iron on low (no water, lol).  I then just press the flower against the hot plate (use tweezers if you need to) only for a second or two.
 Then fold the petals in on themselves and give it a twist.  I try and be quite gentle doing this because I'm quite heavy handed and have torn a few.
 Open out the flower.
 Then lightly stretch the petals into the shape you want.

 When your happy with the shape, use a dab of hot glue (off centre) to stick two together, so that the petals are showing on both flowers, then using a poky tool pierce a hole through the centre.


Foamiran Poinsettia Step By Step 2


Then take a bunch of stamens, I just give the ends a little twist and can usually manage to feed them through the centre, although this can be fiddly.


If you find this too fiddly, you could twist some thin wire around the end of the bunch and then feed them through.

Whichever way I feed the stamens through the flower, I always finish by putting a dab of hot glue at the back of the flower, to ensure the stamens are secure.

Very, very long post, but hope it's explained easily enough for those of you that have asked.  Thanks so much for looking and any comments you may leave, I'll give details of the giveaway tomorrow at some point.


Maria


x